How do you program a robot to walk across an uneven surface without losing its balance?
For students working with a hexapod robot, that question becomes a hands-on programming challenge. They must consider which legs move, which legs support the body, and how the robot should respond when something blocks its path.
Hexapod robotics connects coding with sensors, mechanics, and navigation. Students can begin with simple movement commands and gradually work toward exploration projects involving terrain analysis and mapping.
What Is a Hexapod Robot?
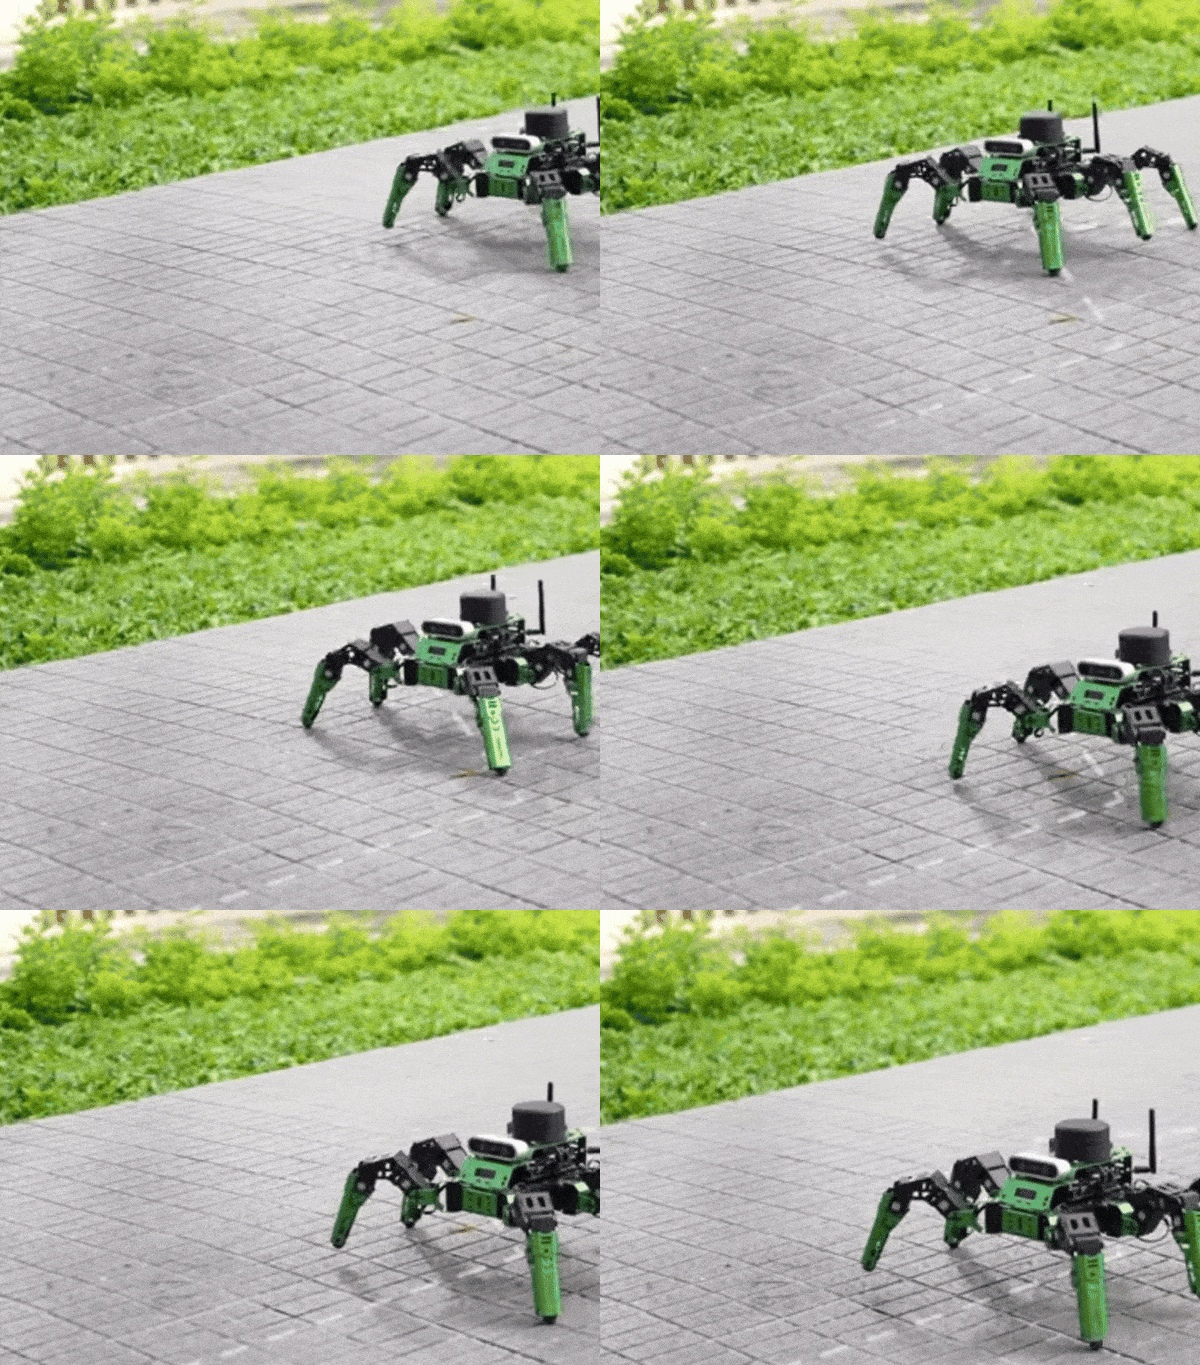
A hexapod robot is a robot that moves on six legs. Many designs resemble insects, with three legs on each side of a central body.
Motors move the leg joints, while a controller runs the software that coordinates their movement. Depending on the platform, sensors can help the robot detect obstacles, measure distances, or gather information about its surroundings.
For students, this creates an interesting challenge: moving one leg is only part of making the whole robot walk. Every movement must work with the other legs to support and move the body.
How Do Hexapod Robots Walk?
The pattern a robot uses to move its legs is called a gait.
One common pattern is the tripod gait. The robot alternates between two groups of three legs. One group supports the body while the other moves forward, then the groups switch roles. Each group includes legs from both sides of the robot.
Students can investigate how changing a movement pattern affects performance:
- Does a shorter step improve control?
- How much clearance does a leg need to step over a small obstacle?
- What happens when the robot moves faster?
- Does the same movement work equally well on different surfaces?
These questions turn movement into an engineering investigation. A program may run without errors and still produce an unstable walk, giving students a reason to observe, measure, and revise their work.
How Can Students Program a Hexapod Robot?
Students can program a hexapod robot by using the robot’s software tools to control movement, adjust walking parameters, and respond to sensor data. The programming language and available commands depend on the platform.
A useful classroom progression starts with basic motion and adds complexity as students gain confidence.
1. Start With Simple Movement Commands
An early challenge might ask students to make the robot stand, move forward, turn, and stop.
Where a platform provides built-in movement functions, students can use them before learning how every joint is controlled. This gives them a practical starting point for applying:
- Sequences: arranging actions in the correct order.
- Loops: repeating a walking sequence.
- Variables: changing movement settings.
- Functions: organizing reusable instructions.
A simple mission could be to move toward a marked location, turn, and return. Students can compare their intended route with the robot’s actual movement and identify where adjustments are needed.
2. Experiment With Walking Parameters
Next, students can investigate the settings behind the movement.
Depending on the robot, these may include step length, walking speed, leg lift height, and body height. Changing one setting at a time helps students connect a specific adjustment with an observable result.
For example, a class could test several step lengths on the same course. Teams could record stability, completion time, and successful trials, then use that evidence to choose a setting.
The goal becomes more specific than “make it walk.” Students must explain why their settings work for the task.
3. Add Sensor-Based Decisions
With compatible sensors, students can write programs that respond to the environment.
A basic obstacle-detection activity might follow this logic:
- Read the distance to an object ahead.
- Compare that distance with a chosen stopping threshold.
- Stop if the object is too close.
- Turn toward another direction.
- Check the path again before continuing.
This introduces conditional statements and feedback. The robot repeatedly checks its surroundings and uses those readings to decide what to do next.
Students can also investigate unreliable readings. What happens if a sensor misses an object or reports an unexpected distance? How should their program respond?
4. Explore Navigation and Mapping
More advanced projects can connect movement with information about the surrounding space.
LiDAR measures distance using laser light. Depth cameras capture depth information about a scene. On platforms equipped with these technologies and suitable software, students can explore how sensor measurements contribute to obstacle detection and mapping.
It helps to distinguish two related tasks:
- Mapping: building a representation of the surroundings.
- Navigation: determining how to move through those surroundings.
A robot may detect an obstacle without knowing its location on a map. Students can explore what additional information and software are needed to connect those capabilities.
5. Investigate How Leg Positions Become Joint Movements
For students ready for more advanced mathematics, hexapods offer an introduction to inverse kinematics.
This means calculating the joint angles needed to place a foot at a desired position.
Students can begin by changing movement settings through existing software. Later, they can investigate the calculations underneath those commands, connecting programming with coordinates, geometry, and mechanical constraints.
What Do Students Learn From Hexapod Robotics?
Hexapod programming makes the relationship between software and physical behavior visible.
Students practice breaking a complex task into smaller steps, testing assumptions, interpreting sensor readings, and improving a design through evidence.
It also challenges a common assumption: six legs do not automatically make a robot capable of crossing any terrain. Performance depends on mechanical design, sensing, movement control, and the surface itself.
Explore Hexapod Programming With LocoHex
LocoHex supports STEM learning with robotics for grades 6–12, connecting Python programming with mobility algorithms, terrain exploration, and real-world problem-solving. LocoHex hexapod robot gives students hands-on learning opportunities to investigate how six-legged robots move, sense, and navigate.
With LiDAR, depth cameras, and terrain-adaptive movement, LocoHex brings robotics in the classroom into exploration projects involving precision mapping, terrain analysis, and autonomous navigation. Students can investigate engineering challenges related to agriculture, planetary exploration, and search-and-rescue robotics.
Its customizable, open-source design supports experimentation with additional sensors, AI, and automation enhancements as students develop their projects.
LocoRobo’s STEM robotics kits connect programming with the physical challenges of movement and exploration, helping students test solutions and learn from the results.
Explore LocoHex and LocoRobo’s robotics solutions to discover how robotics for education can support your school’s STEM, computer science, or CTE programs.